Category: Uncategorized

  • How to Choose the Right Name for Your Website

    How to Choose the Right Name for Your Website

    Domain Name Selection Guide: How to Choose the Right Name for Your Website

    Your domain name is your online identity. It’s the first impression users have of your brand and can significantly impact your website’s credibility, SEO, and overall success. This domain name selection guide walks you through everything you need to know to choose the perfect domain name.

    Why Your Domain Name Matters

    Your domain name plays a crucial role in building trust and brand recognition. It’s not just a web address—it’s a reflection of your business. A well-chosen domain can drive more traffic, improve search rankings, and make your brand more memorable.

    Domain Name Selection Guide – Key Considerations

    1. Keep It Short and Simple

    A short domain name is easy to remember, type, and share. Avoid complex spellings, numbers, or hyphens.

    Example:
    Instead of bestdigital-marketing-agency.com, go for bestdigitals.com.

    2. Use Keywords Strategically

    Including relevant keywords helps search engines understand your site’s purpose and boosts SEO.

    Example:
    If you’re a photographer, a name like urbanphotostudio.com can help your visibility.

    3. Prioritize Branding

    Choose a domain that aligns with your brand identity. Make it unique, pronounceable, and emotionally engaging.

    Tip: Use name generators like Lean Domain Search to spark ideas.

    Choosing the Right Domain Extension

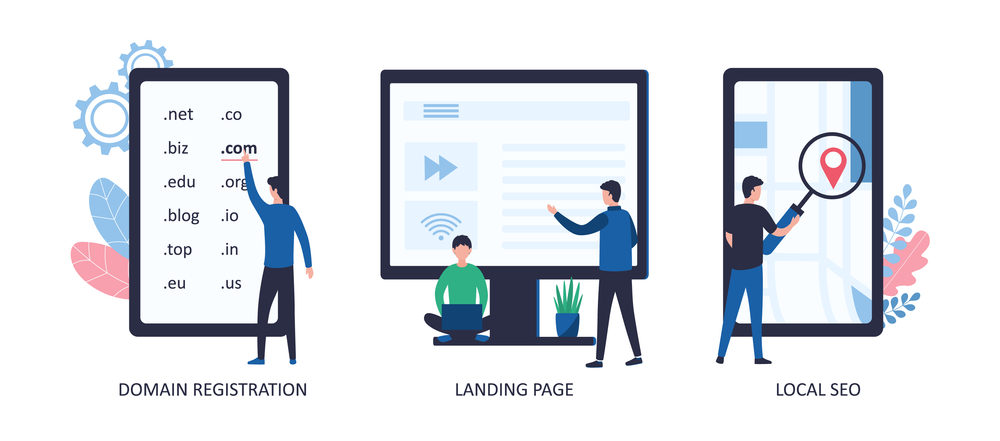
    A domain extension (also known as TLD – Top-Level Domain) follows your domain name, such as .com, .net, or .org.

    1. Go with .com When Possible

    .com remains the most trusted and widely recognized extension. If available, prioritize it over others.

    2. Consider Local and Niche Extensions

    • Use .in if your business targets an Indian audience.

    • Try .tech, .store, or .design for niche relevance.

    Learn more about domain extensions on ICANN.

    Check for Domain Availability and Trademarks

    Before finalizing a domain name:

    • Use a domain registrar like Namecheap or GoDaddy to check availability.

    • Ensure it doesn’t violate trademarks to avoid legal issues.

    • Check social media handles for consistency across platforms.

    Best Practices in Domain Name Selection

    1. Make It Memorable

    Use simple words, rhymes, or alliteration (e.g., quickclick.com, brightbytes.com).

     2. Avoid Numbers and Hyphens

    They’re hard to remember and often misinterpreted when spoken.

    Bad Example: top4u-marketing.com
    Good Example: topmarketinghub.com

    3. Think Long-Term

    Choose a name you can grow with. Avoid trends or fads that may fade in a few years.

    How to Choose the Right Name for Your Website

    Domain Security and Ownership

    Make sure:

    • You register the domain under your own account.

    • Enable auto-renewal to avoid losing it.

    • Use WHOIS protection to hide your personal info from the public domain database.

    Ready to Register Your Domain?

    Still unsure which domain name suits your business? Our team can help you brainstorm ideas, check availability, and even assist with full branding and website development.
    👉 Contact Us Today for personalized domain consultation.

    Final Thoughts

    This domain name selection guide offers actionable tips to help you pick a name that’s SEO-friendly, brandable, and future-proof. The right domain sets the foundation for your digital success. Don’t rush the process—research, brainstorm, and choose wisely.
    Explore more related articles to deepen your understanding

    Is Cloudflare better than Google?

    Does Google use Cloudflare

    Namecheap to Cloudflare: A Complete Integration Guide

  • How to Choose Domain Extension: A Complete Guide

    How to Choose Domain Extension: A Complete Guide

    How to Choose Domain Extension: A Complete Guide

    Choosing the right domain extension is just as crucial as selecting the perfect domain name. Your extension can influence user trust, SEO, and how people perceive your brand. Whether you’re launching a personal blog, business site, or e-commerce store, understanding how to choose domain extension can shape your online success.

    Why Domain Extensions Matter

    Domain extensions, also known as top-level domains (TLDs), are the letters that appear after the dot in your web address—like .com, .org, or .net. These extensions signal the nature and purpose of your website.

    Selecting the wrong extension can confuse visitors or make your site appear untrustworthy. That’s why it’s important to understand your options when deciding how to choose domain extension.

    Types of Domain Extensions

    1. Generic Top-Level Domains (gTLDs)

    These are the most common domain extensions and are not tied to any location. Popular gTLDs include:

    • .com – Best for businesses, most trusted

    • .org – Often used by non-profits or open-source projects

    • .net – Suitable for networking and tech-related sites

    • .info – Used for information-based sites

    Tip: .com is always a safe and professional choice if it’s available.

    How to Choose Domain Extension

    2. Country Code Top-Level Domains (ccTLDs)

    These represent specific countries or regions, such as:

    • .in – India

    • .uk – United Kingdom

    • .au – Australia

    If your business targets a local audience, a ccTLD can help signal regional relevance and improve local SEO.

    3. Niche or New TLDs

    These include industry-specific or creative extensions like:

    • .tech, .design, .store, .app, .blog, .agency

    They’re great for branding but may not be as trusted or familiar to all users. Always evaluate your audience’s comfort with new TLDs.

    Check the complete list of available TLDs on ICANN.

    How to Choose Domain Extension Based on Your Goals

    1. For Businesses

    • Best choices: .com, .biz, .co

    • Avoid obscure TLDs that could hurt credibility.

    • If .com isn’t available, try brand variations or use .co or .io.

    2. For Personal Brands or Blogs

    • .me, .blog, or even .name work well for personal sites.

    • Ensure the extension fits your tone and content.

    3. For Non-Profits or Communities

    • Stick with .org or .foundation.

    • These signal purpose and trust, especially in fundraising and educational spaces.

    4. For Local Services

    • Use a ccTLD to emphasize locality (e.g., .in, .ca).

    • Helps boost geo-targeted SEO and builds local trust.

    SEO and Trust Considerations

    While Google treats all TLDs equally for ranking, user behavior is different. Most users still trust .com more than newer or niche TLDs. If your audience is unfamiliar with .design or .xyz, they may question your site’s credibility.

    ⚠️ Avoid spammy TLDs often linked to scams, such as .click, .loan, or .top.

    Read Google’s stance on domain extensions and SEO.

    Additional Domain Tips

    1. Think Long-Term

    Choose an extension you can grow with. Trends change, but trust in .com remains strong.

    2. Check Domain Availability

    Use trusted registrars like:

    3. Protect Your Brand

    If possible, buy multiple extensions (.com, .net, .org) to prevent competitors or copycats.

    Need Help Picking the Right Domain Extension?

    Struggling with how to choose domain extension that fits your brand? Get expert advice on branding, SEO, and domain registration. Contact our team and we’ll help you make the right digital decisions.

    Final Thoughts

    Choosing the right domain extension isn’t just a technical decision—it’s a branding and trust strategy. Whether you’re targeting a global or local audience, launching a store or a blog, following the best practices on how to choose domain extension will help you build credibility and reach the right people.

    Take your time, research your options, and choose an extension that aligns with your vision.

    Explore more related articles to deepen your understanding

    Is Cloudflare better than Google?

    Does Google use Cloudflare

    Namecheap to Cloudflare: A Complete Integration Guide

  • Best Domain Name Tips to Build a Strong Online Presence

    Best Domain Name Tips to Build a Strong Online Presence

    Best Domain Name Tips to Build a Strong Online Presence

    Your domain name is your digital identity. It’s the first impression your visitors get and a crucial part of your branding, SEO, and marketing efforts. Choosing the right domain can be the difference between a forgettable site and a standout online presence. This post offers the best domain name tips to help you make a smart choice.

    Why Domain Name Matters

    Your domain name impacts your business in multiple ways. It:

    • Reflects your brand identity

    • Affects your SEO performance

    • Influences user trust and click-through rates

    • Determines how easily people remember and share your site

    If you’re starting a business, blog, or online store, following these domain tips can save you from costly mistakes.

    Best Domain Name Tips for Branding & SEO

    1. Keep It Short and Simple

    Short domain names are easier to type, remember, and share. Aim for 2-3 words max. Avoid unnecessary fillers or complex combinations.

    ✅ Good: GreenFreshFoods.com
    ❌ Bad: TheBestOrganicAndNaturalFoodDeliveryService.com

    2. Use Keywords Wisely

    Including a relevant keyword can give your site a small SEO edge. For example, a domain like TechGearStore.com tells both users and search engines what your site is about.

    Avoid keyword stuffing, and only use a keyword if it fits naturally with your brand.

    3. Choose the Right Extension

    The .com extension is the most popular and credible. If it’s taken, other solid alternatives include:

    • .co for startups

    • .net for tech sites

    • .org for nonprofits

    Avoid uncommon TLDs unless you’re building a creative or niche brand.

    Read more about domain extensions on Namecheap.

    Best Domain Name Tips

    Branding Considerations

    4. Make It Brandable

    A brandable domain name is unique, catchy, and easy to say aloud. Think about names like Google, Airbnb, or Spotify—they’re simple, distinct, and stick in your mind.

    Use tools like Lean Domain Search to explore name ideas.

    5. Avoid Numbers and Hyphens

    Numbers and hyphens confuse people and are easy to forget or mistype. For instance:

    best-cakes4u.com
    BestCakesOnline.com

     6. Check for Trademarks and Social Media

    Before you register, check for trademarks using USPTO.gov and ensure social media handles are available. Consistency across platforms boosts brand recognition.

     Technical and Practical Tips

     7. Think Long-Term

    Your domain should grow with your brand. Avoid trendy slang or seasonal keywords that may not be relevant in the future.

    8. Make It Easy to Spell

    Test your domain by telling someone verbally. If they can’t spell it easily, you may want to simplify it.

    9. Act Fast

    Good domain names go quickly. Once you find a name you like, register it before someone else does.

    Where to Register a Domain

    Choose a reliable registrar with good support and security. Some popular options include:

    Also, consider domain privacy protection to keep your personal info hidden from public WHOIS records.

    Need Help Choosing the Perfect Domain?

    Finding the right domain can be tricky, but you don’t have to do it alone. If you want expert help choosing a domain name tailored to your business and SEO strategy, contact our team today.

    Final Thoughts

    Choosing a domain name is one of the most important steps in launching a website. These best domain name tips can help you create a name that’s memorable, brandable, and SEO-friendly. Invest time in research, choose wisely, and secure your domain early.

    Your domain is more than a URL—it’s your online identity. Make it count.

    Explore more related articles to deepen your understanding

    Is Cloudflare better than Google?

    Does Google use Cloudflare

    Namecheap to Cloudflare: A Complete Integration Guide

  • Domain Name with Keywords: A Smart SEO Strategy

    Domain Name with Keywords: A Smart SEO Strategy

    Domain Name with Keywords: A Smart SEO Strategy

    Choosing the right domain name is a key step in building your online presence. One powerful strategy is incorporating keywords into your domain name. This not only helps with SEO but also makes it easier for users to understand what your site offers before they even visit. In this blog, we’ll explore why keywords in domain names matter and how to use them effectively.

    Why Keywords in Domain Names Matter

    Keywords help search engines understand the relevance of your website. When your domain name contains relevant search terms, it can:

    • Improve your website’s SEO ranking

    • Increase click-through rates from search results

    • Clearly communicate your site’s purpose to users

    For example, a domain like “bestdigitalcameras.com” instantly tells both users and search engines that the site is about digital cameras.

    Benefits of Using Keywords in Your Domain

    1. Boost Search Visibility

    Search engines often use the domain name as a ranking factor. Including relevant keywords can slightly boost your visibility, especially in less competitive niches.

    2. Build Trust with Visitors

    Users are more likely to click on a domain that clearly reflects what they’re searching for. A keyword-rich domain looks relevant and trustworthy at first glance.

    3. Improve Branding and Recognition

    When used correctly, a keyword domain can also serve as your brand. Domains like “TravelDealsOnline.com” are both descriptive and brandable.

    How to Choose the Right Keywords

    Start with Keyword Research

    Use tools like Google Keyword Planner or Ubersuggest to find popular search terms related to your niche. Look for:

    • High search volume

    • Low to medium competition

    • Relevance to your product or service

    Domain Name with Keywords

    Focus on Primary Topics

    Choose keywords that reflect your main business offering. For example, if you sell organic skincare, keywords like “organic skin” or “natural beauty” might work well in your domain.

    Tips for Crafting Keyword-Based Domain Names

    Keep It Short and Memorable

    While including keywords is great, don’t overdo it. Avoid long and complicated names like “buybestaffordabledigitalcameras.com.” Instead, aim for something concise and clear.

    Avoid Keyword Stuffing

    Too many keywords in a domain can appear spammy. Google and users may both distrust overly optimized names. Stick to one or two keywords max.

    Use Hyphens Carefully

    If your desired keyword domain isn’t available, adding a hyphen (like best-cameras.com) can help—but too many hyphens can reduce professionalism and memorability.

    When a Keyword Domain Isn’t the Best Choice

    While keyword domains offer SEO benefits, they’re not always ideal. If you’re building a long-term brand, a unique and memorable name (even without keywords) may be more valuable.

    For example, brands like Amazon, Zappos, or Spotify have strong identities without keyword-laden domains. You can build a keyword strategy through content and page optimization instead.

    Check Availability and Protect Your Brand

    Once you’ve chosen your keyword-based domain:

    • Check availability on Namecheap or GoDaddy

    • Secure matching social media handles

    • Register alternative extensions (.net, .org) to prevent brand hijacking

    Need Help Choosing the Right Domain?

    If you’re struggling to find a keyword-rich domain that suits your business, we’re here to help. Contact our team for expert advice on domain strategy and SEO.

    Conclusion

    Using keywords in your domain name can give your website a head start in SEO, make your purpose clear to users, and strengthen your online presence. However, balance is key—choose a domain that’s both keyword-rich and brandable for long-term success.

    Take the time to research, test options, and secure the best possible domain for your business or personal brand.

    Explore more related articles to deepen your understanding

    Is Cloudflare better than Google?

    Does Google use Cloudflare

    Namecheap to Cloudflare: A Complete Integration Guide

  • How to Choose the Right Domain: A Complete Guide

    How to Choose the Right Domain: A Complete Guide

    How to Choose the Right Domain: A Complete Guide

    Your domain name is more than just a web address—it’s your digital identity. Whether you’re launching a new business, blog, or personal brand, knowing how to choose the right domain can significantly impact your online visibility, trustworthiness, and long-term success. In this guide, we’ll help you navigate the domain selection process with smart strategies and actionable tips.

    Why the Right Domain Name Matters

    Your domain name sets the tone for your brand. It influences how users perceive you and plays a role in your SEO and marketing efforts. A poorly chosen domain may confuse visitors or hinder search rankings, while the right one helps establish authority and trust.

    Key Factors to Consider When Choosing a Domain

    1. Keep It Short and Memorable

    Short domain names are easier to remember, type, and share. Aim for something concise, ideally under 15 characters. For example, websites like Moz and Zyro use brief, brandable domains to great effect.2. Choose the Right Extension

    While .com is still the most trusted and widely recognized domain extension, others like .net, .org, or industry-specific ones (e.g., .tech, .shop) may be suitable depending on your business type.

    3. Avoid Numbers and Hyphens

    Using numbers or hyphens can confuse people. For instance, “best-4-you.com” could be misunderstood as “bestforyou.com” or “bestfouryou.com.” Stick to simple spelling and clean wording.

    Align Your Domain with Your Brand

    4. Reflect Your Business Name

    Try to match your domain name with your business name. Consistency across your branding elements boosts recognition and trust. If your exact brand name is unavailable, consider slight variations like adding a keyword (e.g., “get” or “online”).

    5. Think Long-Term

    Choose a name that will grow with your business. Avoid trend-based terms that may feel outdated in a few years. Focus on long-term relevance and scalability.

    Use Keywords (But Don’t Overdo It)

    Incorporating a keyword in your domain can improve SEO and tell users what your site is about. For instance, “greenenergyhub.com” indicates a focus on sustainable energy. However, don’t stuff your domain with keywords—it should still sound natural and brandable.

    How to Choose the Right Domain

    Check Availability and Protect Your Brand

    Before finalizing, check domain availability using a domain registrar like GoDaddy or Namecheap. Ensure:

    • The domain is not trademarked

    • Social media handles with the same name are also available

    • The name isn’t too similar to an existing competitor

    Consider purchasing multiple domain extensions and common misspellings to protect your brand.

    Common Mistakes to Avoid

    • Picking overly complex or hard-to-pronounce names

    • Ignoring future business growth

    • Using slang or trendy spellings that may lose appeal

    • Failing to check for existing trademarks

    Tools to Help You Choose

    Several online tools can assist in generating and validating domain names:

    These tools let you mix keywords, check availability, and spark creative ideas.

    Final Checklist Before You Register

    • ✅ Is the name short and simple?

    • ✅ Does it align with your brand?

    • ✅ Is it easy to pronounce and type?

    • ✅ Is the domain extension right for your audience?

    • ✅ Are the social media handles available?

    If the answer to all is yes, you’re ready to register your domain.

    Still Unsure? Get Professional Help

    Choosing a domain is a critical step in building your online presence. If you’re unsure, our experts can guide you through the process. Contact us for personalized support on domain strategy, website setup, and branding.

    Conclusion

    Knowing how to choose the right domain helps build a strong digital foundation for your business or personal brand. The best domains are clear, relevant, easy to remember, and aligned with your brand’s vision. Whether you’re a startup, a blogger, or an established business, the right domain can give you a competitive edge online.

    Take your time, research carefully, and secure a domain that sets you up for long-term success.

    Explore more related articles to deepen your understanding

    Is Cloudflare better than Google?

    Does Google use Cloudflare

    Namecheap to Cloudflare: A Complete Integration Guide

  • Set Up Cloudflare for GoDaddy Domain: A Complete Guide

    Set Up Cloudflare for GoDaddy Domain: A Complete Guide

    Set Up Cloudflare for GoDaddy Domain: A Complete Guide

    If you’re looking to boost your website’s speed, enhance security, and gain more control over your DNS settings, setting up Cloudflare for your GoDaddy domain is a powerful and free solution. In this step-by-step guide, we’ll walk you through how to set up Cloudflare for GoDaddy domain and unlock key performance and protection features.

    Why Connect GoDaddy Domain with Cloudflare?

    Cloudflare is one of the world’s most trusted web performance and security platforms. Whether you’re managing a business website or a personal blog, pairing your GoDaddy domain with Cloudflare offers:

    Key Benefits

    • Speed Optimization with CDN caching and Brotli compression

    • Free SSL Certificate to secure your domain

    • DDoS Protection and Web Application Firewall (WAF)

    • Faster DNS Resolution compared to default GoDaddy nameservers

    Cloudflare’s DNS was ranked #1 globally by DNSPerf, highlighting its efficiency.

    Set Up Cloudflare for GoDaddy Domain

    How to Set Up Cloudflare for GoDaddy Domain

    Step 1 – Create a Cloudflare Account

    1. Visit Cloudflare and sign up for a free account.

    2. Click “Add Site” and enter your GoDaddy domain name.

    3. Choose the Free Plan or a paid plan if you need additional features.

     Step 2 – Review and Update DNS Records

    After Cloudflare scans your existing DNS:

    • Verify that all important records (A, CNAME, MX, TXT) are imported correctly.

    • If needed, manually add records by going to DNS > Records.

    💡 Tip: Don’t forget to double-check your email-related records (like MX and SPF) to avoid delivery issues.

    Step 3 – Update GoDaddy Nameservers to Cloudflare

    1. Log into your GoDaddy account.

    2. Navigate to Domains > My Domains > Manage DNS

    3. Scroll to Nameservers and click Change

    4. Select Custom and input the Cloudflare nameservers provided during setup

    5. Click Save and wait for DNS propagation (may take a few hours)

     Step 4 – Configure Performance and Security Settings

    Once your GoDaddy domain is connected, fine-tune Cloudflare’s performance and protection tools.

    Enable Speed Optimization

    • Go to Speed > Optimization

    • Turn on Auto Minify for JavaScript, CSS, and HTML

    • Enable Brotli Compression

    Activate SSL

    • Navigate to SSL/TLS > Overview

    • Choose Flexible (or Full if your host supports it)

    • Enable Always Use HTTPS and Automatic HTTPS Rewrites

    Set Up Caching

    • In the Caching section, choose Standard caching level

    • Set Browser Cache TTL for efficiency

    Step 5 – Verify Setup

    • Visit your site using HTTPS and check for the Cloudflare padlock icon

    • Use DNS Checker to confirm your nameservers are pointing to Cloudflare

    • Check Cloudflare > Analytics for traffic and security insights

    Troubleshooting Common Issues

    SSL Errors?

    Make sure the SSL mode matches your hosting environment. If your hosting doesn’t support HTTPS, start with Flexible SSL.

    Email Not Working?

    Verify your MX and SPF records are correctly set in Cloudflare. These often get missed during the DNS import.

    Best Practices After Setup

    • Regularly review DNS records

    • Set up Page Rules for redirects or custom caching

    • Use Firewall Rules for extra protection

    • Enable Bot Fight Mode to block bad traffic

    Need Help?

    If you’re unsure about DNS settings, SSL modes, or performance tweaks, our experts can help. Contact us for professional Cloudflare and GoDaddy support.

    Conclusion

    Setting up Cloudflare for your GoDaddy domain is a smart way to enhance site performance, security, and reliability—all without extra cost. From free SSL to a global CDN and fast DNS, Cloudflare makes your website faster and more secure.

    Take the step today and set up Cloudflare for GoDaddy domain to future-proof your online presence.

    Explore more related articles to deepen your understanding

    Is Cloudflare better than Google?

    Does Google use Cloudflare

    Namecheap to Cloudflare: A Complete Integration Guide

  • Optimize GoDaddy Domain with Cloudflare: Complete Guide

    Optimize GoDaddy Domain with Cloudflare: Complete Guide

    Optimize GoDaddy Domain with Cloudflare: Complete Guide

    If you’re managing your domain through GoDaddy and want to enhance your site’s performance, security, and reliability, integrating it with Cloudflare is a powerful upgrade. This guide will show you exactly how to optimize your GoDaddy domain with Cloudflare, covering setup, configuration, and key benefits.

    Why Use Cloudflare with a GoDaddy Domain?

    Cloudflare is one of the world’s most trusted platforms for CDN, security, and DNS services. Pairing it with a GoDaddy domain allows you to boost speed, reduce downtime, and protect your site from threats—all for free.

    Benefits of Cloudflare for GoDaddy Domains

    • Faster Load Times: Cloudflare’s global CDN caches your content and serves it closer to your visitors.

    • Enhanced Security: Built-in DDoS protection, SSL, and firewall features shield your site from threats.

    • Better DNS Management: Cloudflare DNS is faster and more reliable than GoDaddy’s default nameservers.

    Cloudflare was ranked #1 for DNS performance by DNSPerf.

    Step-by-Step: How to Optimize GoDaddy Domain with Cloudflare

    Step 1 – Create a Cloudflare Account

    1. Visit Cloudflare and sign up for a free account.

    2. Click “Add Site” and enter your GoDaddy domain.

    3. Choose the Free Plan unless you need premium features.

    Step 2 – Scan and Configure DNS Records

    Once Cloudflare scans your domain:

    • Review the DNS records it pulls from GoDaddy

    • Ensure all essential records (A, CNAME, MX, TXT) are accurate

    • You can manually add any missing entries

    Step 3 – Update GoDaddy Nameservers to Cloudflare

    1. Log in to your GoDaddy Dashboard.

    2. Go to My Products > Domains > Manage DNS

    3. Under Nameservers, click Change

    4. Choose Custom, and paste the Cloudflare nameservers provided

    5. Save changes

    It may take up to 24 hours for DNS propagation.

    Step 4 – Enable Key Performance Features in Cloudflare

    After your domain is connected to Cloudflare:

    Enable CDN

    • In the Caching tab, turn on “Caching Level: Standard”

    • Activate Always Online to keep a cached version of your site available

    Turn On Auto Minify

    • Go to Speed > Optimization

    • Enable Auto Minify for HTML, CSS, and JavaScript to reduce load size

    Activate Brotli Compression

    • Also under the Speed section, turn on Brotli compression for faster loading

    Step 5 – Add SSL for Security

    Cloudflare offers free Universal SSL certificates:

    1. Navigate to SSL/TLS > Overview

    2. Select Flexible or Full SSL (based on your hosting config)

    3. Enable Always Use HTTPS and Automatic HTTPS Rewrites

    Common Issues and Fixes

    Email Not Working After DNS Switch?

    Ensure your MX records are preserved during the DNS transfer. You may need to reconfigure them in Cloudflare manually.

    Mixed Content Warnings?

    Use Automatic HTTPS Rewrites or manually update all internal links from HTTP to HTTPS.

    Slow Propagation?

    DNS changes from GoDaddy can take a few hours to fully update globally.

    Monitor and Maintain Performance

    Cloudflare includes analytics that show bandwidth saved, threats blocked, and more. Regularly check:

    • DNS settings for updates

    • Security tab for threats

    • Page Rules (for redirects or specific optimizations)

    Need help with advanced configuration? Contact our team for tailored support.

    Final Thoughts

    Choosing to optimize your GoDaddy domain with Cloudflare is a smart move for any business or personal website. The benefits in speed, security, and reliability are immediate and long-lasting.

    With just a few configuration steps, you’ll have a faster, safer, and more professional online presence—completely free.

    Explore more related articles to deepen your understanding

    Is Cloudflare better than Google?

    Does Google use Cloudflare

    Namecheap to Cloudflare: A Complete Integration Guide

  • How to Transfer Domain from GoDaddy to Cloudflare

    How to Transfer Domain from GoDaddy to Cloudflare

    How to Transfer Domain from GoDaddy to Cloudflare

    If you’re currently managing your domain through GoDaddy and want better performance, DNS management, and security features, moving to Cloudflare is a smart upgrade. In this guide, we’ll walk you through how to transfer a domain from GoDaddy to Cloudflare — including prerequisites, step-by-step instructions, and key benefits.

    Why Transfer Domain GoDaddy to Cloudflare?

    GoDaddy is a widely used domain registrar, but Cloudflare offers enhanced DNS speed, security tools, and intuitive domain management. When you transfer your domain to Cloudflare Registrar, you not only get access to a free CDN, but you also gain the following benefits:

    1. Flat Pricing, No Markups

    Cloudflare doesn’t charge extra for domain renewals — you pay exactly what they pay the registries.

    2. Enterprise-Grade Security

    Enjoy DNSSEC, DDoS protection, and secure WHOIS management included.

    3. Simplified Management

    Control everything — from DNS to SSL — under one intuitive dashboard.

    Learn more about Cloudflare’s pricing and policies on Cloudflare Registrar.

    Prerequisites Before Transferring

    Before starting the domain transfer process from GoDaddy to Cloudflare, make sure:

    • Your domain has been registered for at least 60 days

    • The domain is unlocked in GoDaddy

    • WHOIS privacy is disabled (temporarily)

    • You have access to your domain authorization code (EPP code)

    Step-by-Step: Transfer Domain GoDaddy to Cloudflare

    Step 1 – Add Your Site to Cloudflare

    1. Sign up or log in at Cloudflare

    2. Click “Add Site” and enter your domain name

    3. Select a plan (Free plan is suitable for most users)

    4. Cloudflare will scan your existing DNS records — verify them

    5. Continue to get new Cloudflare nameservers

    Step 2 – Change GoDaddy Nameservers (Optional if only DNS, Required for Full Transfer)

    If you’re only using Cloudflare for DNS, you can just update your nameservers in GoDaddy:

    1. Log in to GoDaddy

    2. Go to My Products > DNS

    3. Under Nameservers, select Custom

    4. Enter the two nameservers provided by Cloudflare

    5. Save changes

    If you want to fully transfer domain ownership to Cloudflare Registrar, continue to the next steps.

    Step 3 – Unlock Domain and Get Authorization Code from GoDaddy

    1. Go to your domain settings in GoDaddy

    2. Make sure your domain is unlocked

    3. Disable Privacy Protection

    4. Scroll to “Additional Settings” > Get Authorization Code

    5. The EPP code will be emailed to you

     Transfer Domain from GoDaddy

    Step 4 – Initiate Domain Transfer in Cloudflare

    1. In your Cloudflare dashboard, go to Registrar > Transfer

    2. Enter your domain and the EPP code

    3. Confirm your WHOIS information

    4. Pay the transfer fee (usually the cost of a 1-year renewal)

    5. Wait for confirmation — transfers typically take 5–7 days

    For additional help, you can refer to Cloudflare’s transfer documentation.

    What Happens After the Transfer?

    Once the transfer is complete:

    • Your domain is now managed by Cloudflare

    • All DNS records are managed in the Cloudflare dashboard

    • Your domain renewals will be handled through Cloudflare at wholesale cost

    • You can now enable DNSSEC, Universal SSL, and other Cloudflare tools

    Need help with the process? Our team can assist you — contact us here.

    Troubleshooting Tips

    Transfer Rejected?

    Ensure your domain is unlocked, WHOIS is visible, and the EPP code hasn’t expired.

    Email Not Working?

    Double-check that your MX and email-related DNS records are correctly transferred.

    Delays in DNS Propagation

    It may take up to 24–48 hours for nameserver changes to propagate globally.

    Final Thoughts

    Choosing to transfer a domain from GoDaddy to Cloudflare gives you far more than just cost savings — you gain speed, control, and enterprise-grade security under a unified platform. If you’re tired of hidden fees and outdated DNS settings in GoDaddy, Cloudflare offers a fresh start and long-term benefits.

    Take the step today and modernize your domain management. For any questions or support, reach out to our expert team for a hassle-free experience.

    Explore more related articles to deepen your understanding

    Is Cloudflare better than Google?

    Does Google use Cloudflare

    Namecheap to Cloudflare: A Complete Integration Guide

  • Cloudflare CDN for GoDaddy Websites: Speed, Security, and Scalability

    Cloudflare CDN for GoDaddy Websites: Speed, Security, and Scalability

    Cloudflare CDN for GoDaddy Websites: Speed, Security, and Scalability

    If you own a website hosted through GoDaddy, adding a Content Delivery Network (CDN) like Cloudflare can dramatically enhance your site’s performance. Whether you’re aiming to speed up page loads, protect your content, or reduce server load, integrating Cloudflare CDN for GoDaddy websites is a smart and accessible solution.

    We’ll explore what Cloudflare CDN is, why it’s beneficial for GoDaddy users, and how to set it up effectively.

    What Is Cloudflare CDN?

    A Content Delivery Network (CDN) is a network of globally distributed servers that cache and deliver website content based on a visitor’s location. Cloudflare is one of the most popular CDN providers, offering free and premium plans packed with performance and security features.

    Instead of serving content directly from your GoDaddy-hosted server, Cloudflare caches static files like images, CSS, and JavaScript, and serves them from the nearest data center to your users.

    Benefits of Cloudflare CDN for GoDaddy Websites

    1. Faster Load Times

    Cloudflare has a massive global infrastructure with over 300 data centers. By distributing your content geographically, you significantly decrease latency, resulting in faster page loads.

    2. Reduced Server Load

    Offloading requests for static content means your GoDaddy hosting server doesn’t have to handle every visitor directly — helping your site stay fast even during traffic spikes.

    3. Built-In DDoS Protection

    Cloudflare offers automatic DDoS mitigation, protecting your GoDaddy website from malicious traffic and bot attacks.

    4. Free SSL and HTTPS

    With Cloudflare’s free SSL certificate, your site is automatically served over HTTPS — enhancing both security and SEO rankings.

    5. Site Optimization Features

    Cloudflare includes features like Auto Minify, Rocket Loader, image optimization, and cache control, improving site performance without manual coding.

    How to Set Up Cloudflare CDN with GoDaddy

    Step 1 – Sign Up for Cloudflare

    1. Visit Cloudflare

    2. Create an account

    3. Click “Add a Site” and enter your GoDaddy domain

    Cloudflare will scan your domain’s DNS records.

    Step 2 – Review and Confirm DNS Settings

    After scanning, Cloudflare will display your current DNS records. Double-check all entries, especially:

    • A records (pointing to your hosting server)

    • MX records (for email delivery)

    • CNAME records (for subdomains)

    Click Continue once verified.

    Cloudflare CDN for GoDaddy Website

    Step 3 – Choose a Plan

    Select the Free Plan if you’re just starting. It offers CDN, DDoS protection, and SSL without any cost.

    Step 4 – Update GoDaddy Nameservers

    Cloudflare will give you two nameservers (e.g., lisa.ns.cloudflare.com and tom.ns.cloudflare.com).

    1. Go to your GoDaddy Domain Settings

    2. Navigate to My Products > DNS > Manage DNS

    3. Under Nameservers, select Custom and enter Cloudflare’s nameservers

    4. Save and allow up to 24 hours for propagation

    Post-Setup Configuration

    Once your domain is active on Cloudflare:

    Enable CDN

    Cloudflare automatically enables CDN functionality upon nameserver change. You don’t need to configure anything further to activate the CDN.

    Optimize Performance Settings

    Go to the Speed tab in Cloudflare and activate:

    • Auto Minify (HTML, CSS, JavaScript)

    • Brotli compression

    • Rocket Loader (optional for JS-heavy sites)

    For in-depth setup guides, check Cloudflare’s developer documentation.

    Monitoring Your Website

    After setup:

    • Use GTmetrix or Google PageSpeed Insights to test your site speed

    • Monitor Analytics in your Cloudflare dashboard to view traffic, threats, and bandwidth savings

    Common Troubleshooting Tips

    • Email Not Working?
      Ensure MX records and email-related settings remain unchanged during migration.

    • SSL Errors?
      In Cloudflare’s SSL/TLS tab, set mode to Full or Flexible, depending on your GoDaddy server’s SSL support.

    • DNS Propagation Delay?
      Nameservers may take up to 24 hours to fully propagate. Don’t worry if changes aren’t immediate.

    Need help setting things up? Contact our support team for one-on-one guidance.

    Conclusion: A Smart Move for Your GoDaddy Website

    Integrating Cloudflare CDN for GoDaddy websites is one of the easiest ways to improve speed, boost security, and enhance user experience — all without upgrading your hosting plan. Best of all, the core features are completely free.

    If you’re running an eCommerce store, blog, portfolio, or business website on GoDaddy, there’s no reason not to take advantage of what Cloudflare offers. With a quick setup and long-term gains, it’s a win-win for your site’s performance and protection.

    Explore more related articles to deepen your understanding

    Is Cloudflare better than Google?

    Does Google use Cloudflare

    Namecheap to Cloudflare: A Complete Integration Guide

  • Migrate GoDaddy DNS to Cloudflare: A Step-by-Step Guide

    Migrate GoDaddy DNS to Cloudflare: A Step-by-Step Guide

    Migrate GoDaddy DNS to Cloudflare: A Step-by-Step Guide

    If you’re hosting your domain with GoDaddy but want faster performance, better uptime, and stronger security, moving your DNS management to Cloudflare is a smart move. In this guide, we’ll show you how to migrate GoDaddy DNS to Cloudflare in a few easy steps.

    Cloudflare’s free DNS service is not only faster than most domain registrars — including GoDaddy — but it also includes advanced features like DDoS protection, a global content delivery network (CDN), and free SSL certificates.

    Why Migrate GoDaddy DNS to Cloudflare?

    GoDaddy is a great domain registrar, but Cloudflare offers superior DNS performance and added benefits. When you migrate your DNS to Cloudflare, you get:

    • Ultra-fast DNS resolution

    • Improved website load speed

    • Free SSL certificate

    • DDoS protection and firewall

    • Advanced caching and optimization features

    By keeping your domain registered with GoDaddy and managing DNS via Cloudflare, you get the best of both worlds.

    What You Need Before Starting

    Before you begin the migration, ensure the following:

    • You have access to your GoDaddy domain account

    • You’ve created a free Cloudflare account

    • You know your current DNS records (Cloudflare auto-scans, but manual backup is recommended)

    For extra security, export your current DNS records from GoDaddy, or take screenshots of the current setup.

    Migrate GoDaddy DNS to Cloudflare

    Step-by-Step: How to Migrate GoDaddy DNS to Cloudflare

    Step 1 – Sign Up on Cloudflare

    Go to Cloudflare.com and create an account. After logging in:

    1. Click “Add a Site”

    2. Enter your GoDaddy domain (e.g., yourdomain.com)

    3. Cloudflare will scan your current DNS records

    Step 2 – Choose the Free Plan

    After scanning, Cloudflare will show your DNS records. Confirm they are correct (especially MX and CNAME records for email and subdomains).

    Then choose the Free Plan, unless you require premium features.

     Step 3 – Update GoDaddy Nameservers

    Cloudflare will now show two nameservers (e.g., eva.ns.cloudflare.com, josh.ns.cloudflare.com).

    1. Go to GoDaddy.com

    2. Navigate to My Products > Domains

    3. Click Manage DNS for the domain you’re updating

    4. Scroll to the Nameservers section > Click Change

    5. Select Custom, and input the Cloudflare nameservers

    6. Save changes

    GoDaddy may take a few minutes to hours to update the nameservers globally.

    Step 4 – Confirm Migration on Cloudflare

    Once your nameservers are updated, return to Cloudflare. They will detect the change automatically. When completed:

    • Your DNS is now managed through Cloudflare

    • You can enable features like SSL, Caching, and Firewall

    You’ve successfully migrated your GoDaddy DNS to Cloudflare!

    Post-Migration Optimization Tips

    Once your DNS is active on Cloudflare, take advantage of its features:

    • SSL/TLS: Set to Full or Flexible under Cloudflare settings

    • Always Use HTTPS: Force HTTPS for secure browsing

    • Auto Minify: Compress CSS, JS, and HTML files

    • Caching Rules: Improve speed with browser caching and edge caching

    • Page Rules: Set custom rules for redirects, cache behavior, and HTTPS enforcement

    You can also enable Rocket Loader to improve JS loading and reduce render-blocking scripts.

    For a helpful guide on setting up caching, check Cloudflare’s Caching Best Practices.

    Common Issues & Troubleshooting

    Here are a few common issues after DNS migration:

    Email Not Working?

    Check MX records and ensure they match your original GoDaddy records. You may need to manually re-add them if Cloudflare didn’t pull them correctly.

    SSL Error or Site Insecure?

    Ensure SSL is enabled in Cloudflare and verify your hosting supports it. You can toggle between Flexible, Full, and Full (Strict) depending on your hosting setup.

    Site Slow or Not Loading?

    Purge cache in Cloudflare, and ensure the A records are pointing to the correct IP address of your web host.

    Need support? Contact our team for expert help with your DNS migration.

    Final Thoughts

    Migrating your GoDaddy DNS to Cloudflare is one of the easiest and most powerful upgrades you can make to your website’s infrastructure. You retain your domain registration with GoDaddy while leveraging Cloudflare’s blazing-fast DNS, built-in security, and performance tools — all on a free plan.

    By following this guide, you’ve not only boosted your site’s speed and reliability but also set the foundation for better scalability and uptime.

    Explore more related articles to deepen your understanding

    Is Cloudflare better than Google?

    Does Google use Cloudflare

    Namecheap to Cloudflare: A Complete Integration Guide